xTool M1 10w Laser and Blade Machine Review
If you are a crafter you may already have a cutting machine such as a Silhouette or a Cricut maker machine but perhaps you are now looking for something to do a bit more. In this xTool M1 10w Laser and Blade Machine Review for Craft Projects we look at everything you need to know before purchasing your first laser machine and doing your first project.
I could be compensated, if you click on a link in this post via a cash payment, gift or something else of value for writing this post. See our full disclosure policy and privacy policy for more details.
The xTool M1 could be the perfect next step for your hobby or small business. As the Xtool is housed in one box it is one of the easiest laser machine set ups on the market, but is it any good? Even out-of-box the xTool M1 can produce some great results and interesting projects.
This post may contain affiliate links, which means we may receive a commission if you click a link and purchase something that we have recommended at no extra cost to yourself. As an amazon associate, we earn from qualifying purchases.
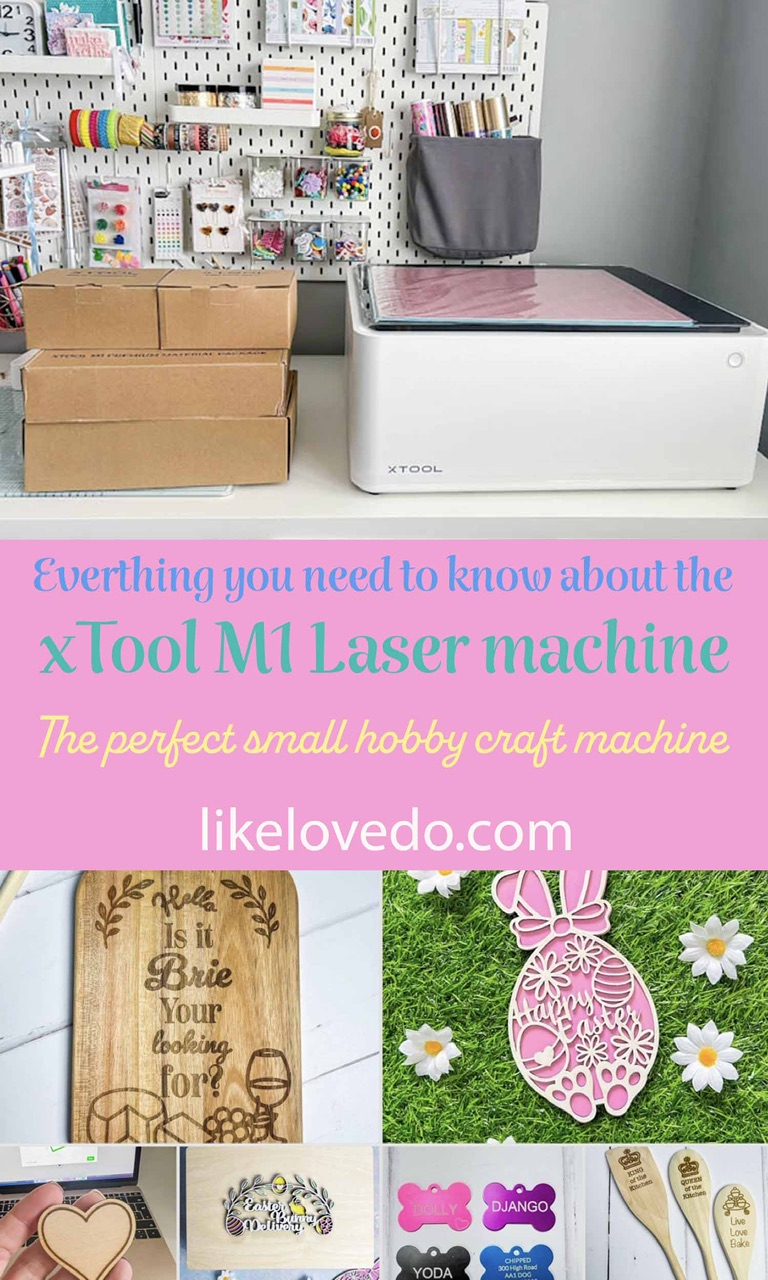
Everything you need to know about the xTool M1 Laser and Blade cutting Machine for your Crafting Projects.
What is the xtool m1?
The xTool M1 is a Laser cutter, Laser engraver, and Blade cutter all in one machine. It is housed in one plug in and go medium size desktop box that is quick to start using. It can be used quite easily for home crafting as well as small businesses and professional establishments. The xTool can cut and engrave a variety of materials that are available from wood to cork as well as engraving metals.

Is the xTool M1 worth it?
Is the xTtool M1 worth it lets look at its key functions to work out if the xTool is the right laser tool for you with these key tips before purchasing.
What is unique about the xTool M1 machine:
- The xTool has 16 MP ultra wide-angle camera. This enables a live preview of your project on your computer for easing lining up.
- The xTool m1 comes in its own housing making it easier to use indoors than the D1
- There are two different M1 machines a 5w and a 10w these two different laser powers are priced differently with the 5w being the cheapest. However they can basically handle a similar set of materials. The only variation would be the speed and ease of use.
- The xTool comes with its own unique xtool creative design suite where you can design your project and see where its going to cut within the screen. The creative space software is a bit like Sihouette studio and Cricut design space
- The xTool M1 is a hybrid laser machine offering you two types of cutting functions a blade as well as a laser for cutting. This makes it an excellent 2 in 1 cutting machine.
- The xtool is one of the most reasonably priced laser tools on the market at a fraction of the price of a Glowforge but keep in mind you may need to spend more on xTool accessories, such as the Air Assist, Riser kit or the Purification tool to get more clean consistency from the xTool M1.
You can purchase the xTool M1 direct from xTool or even on xTool on Amazon directly
What is an xTool M1 used for?
An xTool M1 xTool can be used on a variety of materials for both laser cutting, blade cutting, and laser engraving! You can engrave Tumbler’s, Chopping boards, Wooden ornaments and lots of other items. It can cut paper, card, leather, wood and some acrylics meaning you can make so many different things!
What accessories can you get for the xTool M1
There are extra pieces of equipment that you can upgrade your xTool M1 machine to advance your cutting options such as:
- The RA2 pro tool which is a handy rotary accessories with a chuck to engrave round and cylindrical items.
- Air assist which blows strong airflow for deeper faster and cleaner cutting.
- Honeycomb base to sit your projects on with large honeycomb holes that ensure fast heat dissipation
- Riser base housing panel to raise up your machine and make room for the RA2 pro and honeycomb
- Smoke purifier to remove impurities in the air with filtration such as premium activated carbon and HEPA filters to achieve 99.97% purification. This would enable the xTool M1 to be placed in other areas of the room not needing a window to vent

What kind of laser is in the xTool m1 machine?
The xTool M1 is a diode laser machine which is not as powerful as a CO2 laser. The xTool M1 laser module is available as a 5 watt and a 10 watt laser machine which costs far less to make that a powerful CO2 laser. This makes the Xtool a more affordable laser choice for the home crafter and smaller projects. CO2 laser engravers are more powerful than diode lasers. They can cut lots more more materials as the laser beams provide a lot more heat energy. The optical power of CO2 lasers ranges from 40W to an astounding 300 Watts.
What different materials can the xTool cut?
The xTool M1 can cut a variety of different materials some using the laser and some by using the blade. It can cut to a thickness of 8-mm on wood or a 3-mm acrylic sheets in one pass.
The 5w and the 10w laser cuts material including:
- Wood
- Cork
- Paper
- Card
- Some acrylics
The blade in the xTool M1 can cut:
- Paper
- Card
- Vinyl
- Leather
- PVC sheets
- Stickers
What can the XTool m1 engrave?
The xTool M1 can engrave a variety of different materials such as:
- Stainless Steel Dog Tags
- Metal business cards and holders
- Stone or slate such as coasters
- Wood such as plywood or items like coasters or chopping boards
- Empty vape cases
- Metal tumblers using the RA2 pro tool attachment sold separately or with the Xtool RA2 pro M1 package.
- ceramic tiles and plates
- Mirrors from reverse

The content that comes in the xTool M1 10w box?
- xTool M1 Laser & Blade Cutting Machine
- 1 x Power Adapter
- 5 replacement cutting blades
- Prisms for placing on base
- Exhaust fume tube and attachments
- 2 cutting mats for the blade
- Instruction book
- Sample of materials

What is xTool’s graphic design software and how do you use it?
The xTool graphic design space programme is called xtool creative software. It does a variety of different functions and is easy to use. The XCS software is compatible with Windows and macOS.
You can completely create an image using text or import and upload a PNG or SVG to the creative space. There are options to weld text together and create offsets to cut around engraving images. There will be more on the creative space in another post as it has so many options.
How big is the xTool?
The xTool size and cutting size is:
- The xtool m1 box measures 22″ wide x 18″ deep x 9″ tall and can easily stand on a desktop surface.
- The xtool m1 cutting size has a working area of 15 x 1 2 inches
- The M1 machine is also quite light and easy to manoeuvre.
How easy is the xTool M1 to set up?
The xTool m1 is really easy to set up it literally is a plug in and go machine with just a few extra bits needed before you can start playing. The exhaust hose of the M1 is made from a black durable plastic and is easily connected with a housing piece and a metal hook to the machine’s rear vent at the back of the machine. The xTool M1 hose is around 1.5 metres long. This length of the hose may limit where you place your laser cutting machine, as will need to be on a desk or surface near a window.

What is the M1 10w deluxe RA2 Pro?
The M1 10w deluxe RA2 Pro is a version of the M1 which comes with the riser blocks, Rotary tool and the deluxe materiel package. This enables you to start straight away with your project straight out of the box.
Included in the M1 10w deluxe RA2 Pro Box is:
- The 10w xtool M1 machine
- The RA2 rotary tool with chuck for engraving cylindrical projects
- Riser wooden blocks to raise the base to make room for thicker projects.
- A deluxe material package
What does the deluxe material package contain?
The deluxe material package contains?
- Stainless steel dog tags
- Jewellery set to engrave
- Metal cards
- Card holder box
- Two stone coasters
- Laser marking coloured paper
- Wooden coaster
- Wooden phone stand
- Wood tag
- Basswood plywood 3mm
- Black walnut plywood 3mm
- Kraft paper
- Pu heat transfer vinyl
- Self adhesive PVC sheet vinyl
- White sticker paper
- Pu leather
- Coloured glossy pvc sheets
- Transparent frosted PVC
- A canvas tote bag ( for use with heat transfer vinyl )
- Instructions sheet

Let see what the M1 10w deluxe RA2 Pro machine can do
I received the M1 10w deluxe RA2 Pro and have played around with it for a few weeks. There is absolutely so much you can do with it. I have engraved on metal and wood, cut paper and wood and and vinyl using both the laser and the blade. Here’s a look at what you can do straight out of the box of the M1 tool. More to come on the rotary tool on my next post as there is so much to learn and I want to do it all! With this version you get all of the other bits in the box but with the extra rotary and risers.
Heath and safety and cleaning with the xTool M1
Never leave your m1 unattended! The laser can be a fire risk especially when cutting, wood, paper or card type materials.
Watch out for any small flares ups on the wood with the laser. Fires can start quickly if you see a small flame open the lid and stop the machine. Keep a fire blanket and a small fire extinguisher close by for emergencies ( this may damage your machine but so will a fire!). This risk can be reduced if you have the air assist and honeycomb which will distribute the heat.
The machine creates smoke, toxic fumes and particles in the air make sure you are in a well ventilated area and the hose is out of a window. This can be reduced if you have the air purifier which is an extra.
Laser machines can become dirty because of this and will require regular cleaning and maintenance. The machine will tell you when the laser lens needs cleaning in a message on the xTool software.
How to clean the xTool M1 laser lens
The easiest way to clean the xTool laser lens is to use a cotton bud and some rubbing alcohol. Remove the gold blade by gently pulling it from the blade housing as it is magnetic and will get in the way. Simple soak a cotton tip in some rubbing alcohol and bend in half or it will be too long. Place your mobile phone camera up under the lens housing unit. You will see the circular lens next to where the blade was gently wipe the round lens with the Q tip. You can wipe the rest of the machine with a damp cloth or baby wipe.
Laser engraving and cutting wood on the M1
Engraving wood with the M1
The xTool M1 is fantastic at engraving wood I used the rectangular block of wood setting. These are regular wooden baking spoons engraved with the xTool M1. These used an imported PNG and text with in the creative space programme. Create these Baking tools using my free baking tools SVGs here.

Cutting wood on the M1
First cut and engrave I used prisms and cut at the machines settings for Wood 3mm basswood ply. This project was a PNG image which was set to engrave. I created an offset and set that to cut using the xTool settings.

This is an Easter bunny SVG cut on the xTool M1 with 10 watt laser. As you can see it cut perfectly well but there is some scorching. The air assist and honey comb would help with this and it could cut cleaner and quicker. I used the machine settings and auto measured checking the settings.
Grab the Free Easter Bunny SVG and PNG here

Cutting paper with laser and the blade on the xTtool M1
There are two ways of cutting paper and card on the xTool M1 by laser or by blade.
Cutting paper with the blade on the M1 blade-cutting machine
To cut with the blade you need to position a cutting mat in to the machine. The less tacky one is a good one to start with. There are two sides to the mat, peel the film off of the mat on both sides so that you can stick it to the base surface.
Place your card or paper on the sticky side up and use the blade. You can experiment with pressure as if you have very thick card it may need adjusting.
Cutting paper with the laser on the xTool M1
You can also cut paper and card with the xTool M1. It may blow away if not held in place but do not use a pink or blue mat it will destroy it. To cut paper or card place the triangular prisms in the bottom of the machine. Place paper on top. You can place some prisms on top of the paper around the edge to hold the paper in place. Remove the blade if you do this as the blade will not the top prisms. Watch carefully for any flare ups. Use the kraft card setting. If you have honeycomb you can way it down with magnets.

Cutting vinyl on the M1
Vinyl can be cut on the xTool M1 easily using the blade option. Do not use the laser as this will give off harmful fumes. The Vinyl factory setting in the creative software works perfectly with the setting for vinyl blades in creative space. You can create a multitude of projects such as diy t-shirts, bags and home decor such as cushions. After cutting the heat transfer vinyl I applied it to the canvas bag using a heat press.
Note: The heat transfer vinyl supplied in the xTool deluxe material pack is cold peel. This means after pressing you must wait for the vinyl image to cool. Then you can peel off the clear backing off this will prevent it lifting.

Engraving metal on the M1
Metal is great fun to engrave on the xTool M1 and it creates a fine detailed finish. I used the dog tag or metal business card settings with project laid flat on the base of the machine. You can engrave very small items such as these coloured dog tags.

General tips and Quick guide on how to create your first projects using the xTool M1 10w machine
- You can create a project directly in the software or you can import image to be engraved or cut. You will need an SVG for cutting or a PNG for engraving
- Use prisms to raise up your wooden projects that are going to be cut. This allows airflow under and around the project to cut down on overheating.
- Use the cutting mats for blade cutting only for paper, card and vinyl. If you laser on this it will cut right through it and ruin your mat.
- Use tin foil to protect your base plate from any mess caused by the lasering. Wood and glue residue can make the base plate dirty. Use the foil dull side up you can then tip off any pieces of wood that falls out.
- Select your project in the creative space. You can drag it to any size. Once your machine is turned on you can see the project on the screen.
- You can also design within the creative space programme. You can select various shapes and text.
- When you have designed your project you can select which parts you need to engrave or cut.
- You then must choose the power settings. The xTool recommend settings in the creative programme are a good guide line to start with.
- Make sure your project is placed in the machine with the red laser dot showing on the surface. This way the machine can measure how high the object is to engrave.
Steps to create your first project on the xTool M1
Use these steps to create your first project on the xTool M1:
- Import image into xTool creative software
- Scale your image by dragging the corner to using the width and height in the top boxes
- Turn on your machine
- Place material in the machine under the red dot
- Once the machine is on you will see you object on the screen move your image to fit
- Add any text you wish and line up
- Select on the right hand panel whether you want to engrave, score or cut
- Go and select whether your project is laying flat on the base or on prisms
- Select user defined material for a good guide on settings to use
- Press auto measure and let the red dot check how high your material is.
- Realign your design if necesary
- Process you project
- Frame your project this will draw an outline of where your image will be this is not always necessary. You will need to look in to the machine from above.
- Then you can process and press the start button on the front of the machine
- Watch your project at all times and do not leave the machine unattended
- Remove project from the machine
XTool M1 10w review the conclusion
What’s the verdict? Overall the M1 is a very capable digital laser machine and a great starter laser for any crafter. The options are endless and it is a brilliant all round machine for a multitude of different projects. It is the perfect desk top size so it’s great for smaller craft rooms or small spaces. I loved the fact I can pop it on a desk and plug it in and be creating projects in minutes.
It does take a bit of practise but starting with small projects and using the xTools recommended settings I had created some great craft bits in no time. It’s a great machine for making gifts and even making projects to sell but not on mass production due to the time of some of the projects.
Being as it a diode laser I would recommend getting the 10 watt machine as it does take a while to cut bigger projects. The price difference is not tha
If you intend on cutting wood mainly then the extra air assist and honeycomb would be a great extension to cut down on laser burn marks. You would then need the riser base for the honeycomb and to raise the machine up.
The xTool M1 is the perfect crafters companion to enable you to do more with your hobby
Overall I am thrilled with the machine and the metal engraving is so accurate and relatively quick on small projects. My next project is using the rotary tool to engrave tumblers but you can even engrave on ceramic and mirrors.
If your primary projects are cutting on acrylic this may not be the best for you. The xtool can cut acrylic and they do sell comparable ones on the xTool website. But it does not cut all colours such as white, clear and blue. Some people have successfully cut acrylic but you may need to do a test grid first.
The blade option is a great addition as it is very simple to use and changing blades is a breeze! You have two options to use the blade or laser on certain materials meaning you do not need more than one machine such as having an extra Cricut machine. Something that many other machines can’t do.
I found the deluxe material pack really packed full of lots of different items which I am still making my way through. Having a selection of various items to try is a great way to get to know how to use your laser machine and you will find which items you like to work on best.
As a starter machine for beginners it is great but you can upgrade with some of the extras making it better for small businesses too. The list of crafts you can make is endless, I am still coming up with new ideas and new materials to try.
If you want something with more power you can look at the xTool’s D1 lasers.
This machine was kindly gifted by xTool but all thoughts and opinions are my own.
Please stay tuned for more xToll craft projects