Beginners Sewing your First Stevie Dress a Tilly and the Buttons Pattern
These are my tips for sewing your first Stevie dress for beginners.
Tilly and the buttons patterns are the perfect sewing projects to get you started. Here are my top tips on how to sew a stevie dress for beginners from a complete newbie sewer! Just so you don’t miss anything along the way like I did.
I could be compensated, if you click on a link in this post via a cash payment, gift or something else of value for writing this post. See our full disclosure policy and privacy policy for more details.
Sewing your first dress can be daunting. So pick something easy to get you started. I opted for a Tilly and the Buttons Stevie dress which is a classic boxy shift dress.
Sewing a Stevie dress or item of clothing for the first time comes with many questions. Although my sewing skills envolved straight lines and no idea of any sewing terminology I have picked up some tips and learnt so much along the way. Many questions on sewing your first Stevie dress I could not find on the internet or rather those people never came across the same obstacles as myself, probably because they were a more advanced sewer than me!
But it really is so easy to sew your own dress great fun and a fantastic accomplishment, anyone can do it!
Want to learn to sew online at home? check out these online classes!

Tip no 1 read the instructions first!
Read the back of the pattern packet of the Tilly and the Buttons Stevie dress first before choosing your material. I will tell you I made the mistake of looking at the fabric choice choosing my fabric and heading of to France without any interfacing! You need the right amount of fabric based on your dress size in a variety of fabric choices. I chose a medium weight cotton with a slight stretch. I personally went into fabric shop to get the right fabric by touch and making sure it did not crease.
You also need matching thread and 0.3 metres of interfacing in a similar weight fabric.
You will need a button and a elastic hairband if you do not wish to do the fabric straps.

Do you really need interfacing?
This is what I struggled with the most, I had forgot to buy interfacing but made do by buying some repair fabric in a local supermarket, I did not need this. If your fabric is thin or flimsy you will need interfacing for some support around the neck. If your fabric is thicker with support you may not.

The Tilly and the Buttons patterns are really easy to follow. The diagrams are clear and there are plenty of tips online.

Sizing tip, what size should I cut my stevie dress?
Measure yourself according to the instructions and work out your dress size. All preprinted Tilly and the Buttons patterns come with a fantastic colour booklet inside.
The booklet not only gives you the measurements for making the dress by measuring your body but also the finished garment size. I found this very helpful when determining my size to cut. The stevie dress is meant to be loose fitting and not cling to your body otherwise the waist will look baggy and out of shape.
I was inbetween two sizes for the Tilly and the Buttons Stevie dress and the pattern advises you to go up a size. However I was wary of going up too big and it looking huge around the bust. If you check the finished size you can determine if you really need the extra room. I took the size in the middle and it was perfect.
The Tilly and the Buttons pattern is easy to follow each size line is different.
You can alter the lines from the smaller size to the bigger size. So next time I may adjust this further.

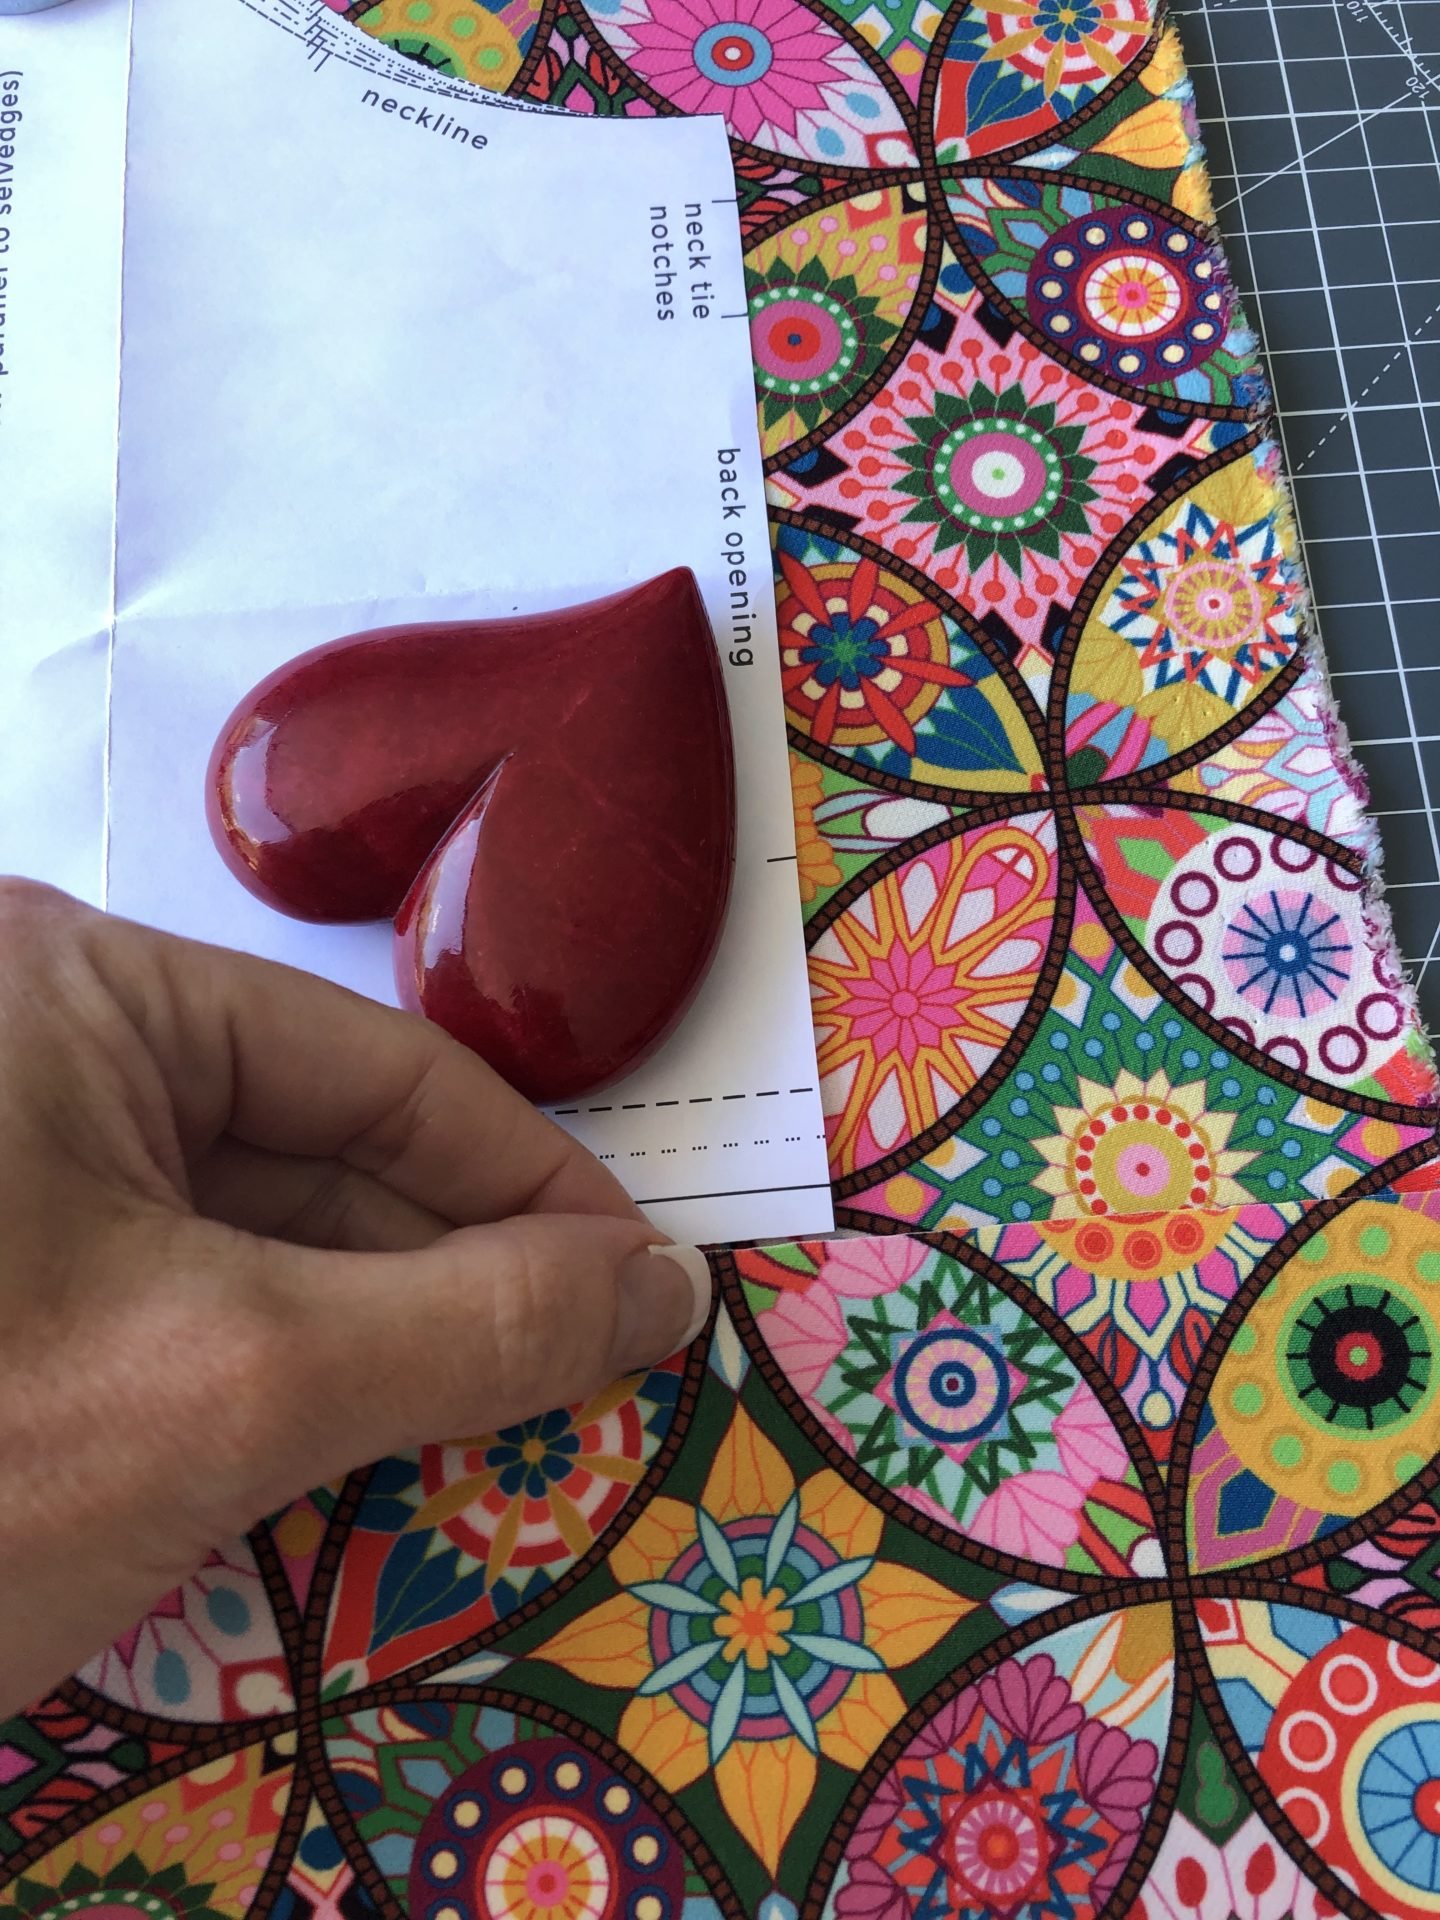
Cutting your fabric
The first rule of thumb is to check, check and check again before you cut! The Tilly and the Buttons instruction book tells you how to arrange your fabric how to lay out your pattern so that it fits.
Make sure to pin your pattern pieces in place especially where you have a double thickness of material so that you cut them straight.
Check before you cut! Is your fabric up the right way? Does the pattern piece need to be on the fold? Do you need a pattern piece cut twice?
You can use a friction marker pen to mark out your pattern ( this disappears on ironing) If you are not confident at using a rotary cutter cut your pieces by hand.

Read through the sewing terminology in the front of the book before sewing
The sewing jargon is clearly displayed in the front of the book and if you are not familiar with sewing terminology it is essential to read it. Throughout the book you will see words like tack, edgestitch and back tack. If you are reading the instructions you may mistake these terminology words for simple sewing stitches.

Stevie dress hacks
I really loved the Tilly and the Buttons Stevie dress for beginners and I will be making more! You can do so much when sewing a Stevie dress!
- How about making a Stevie top or dress with leftover fabric? You could make the whole back yoke in a different fabric?
- Try doing a different fabric for the sleeve cuffs, pocket and ties?
- Add a fabric belt to nip the waist in! I did this and it has made my dress more versatile.
- You could also substitute ribbon for the back ties, how pretty would this look?

Can you make a Tilly and the Buttons dress in scuba fabric?
Yes! My next Tilly and the Buttons Stevie dress I made in Scuba fabric. It is really easy to cut and does not fray. It does not iron well and does not stay folded so the folded sleeves need at bit more tacking down. I made this dress pattern with a button and loop closure which looks fabulous however it did snag my hair. I added an extra inch to the dress of the Stevie as I wanted a belt and this makes it ride up a little.

Pattern matching a Stevie dress.
Make sure to match your back and front patterns and also your shoulders for the pattern. Lay your cut piece next to the next pattern piece you are cutting. I used pattern weights for this fabric and a rotary cutter.
Thank you for reading my top tips for sewing your first stevie dress for beginners. I hope you enjoy sewing yours!
D x