Sunflower and Hydrangea Scrapbooking Printables
Sunflower and Hydrangea Scrapbooking Printables with floral cut file. This collection of scrapbooking ephemera, papers and cut file are all in a lemon and lilac theme of Sunflowers and Hydrangea’s. These are perfect for summery general or autumn scrapbooking pages. This collection was made for the scrapbooking summit where you get these products for free by signing up. To Download click on the Download image at the bottom of the post.
I could be compensated, if you click on a link in this post via a cash payment, gift or something else of value for writing this post. See our full disclosure policy and privacy policy for more details.
Otherwise you can purchase the collection for £5 in my shop.
You can also sign up to the VIP Bundle here!
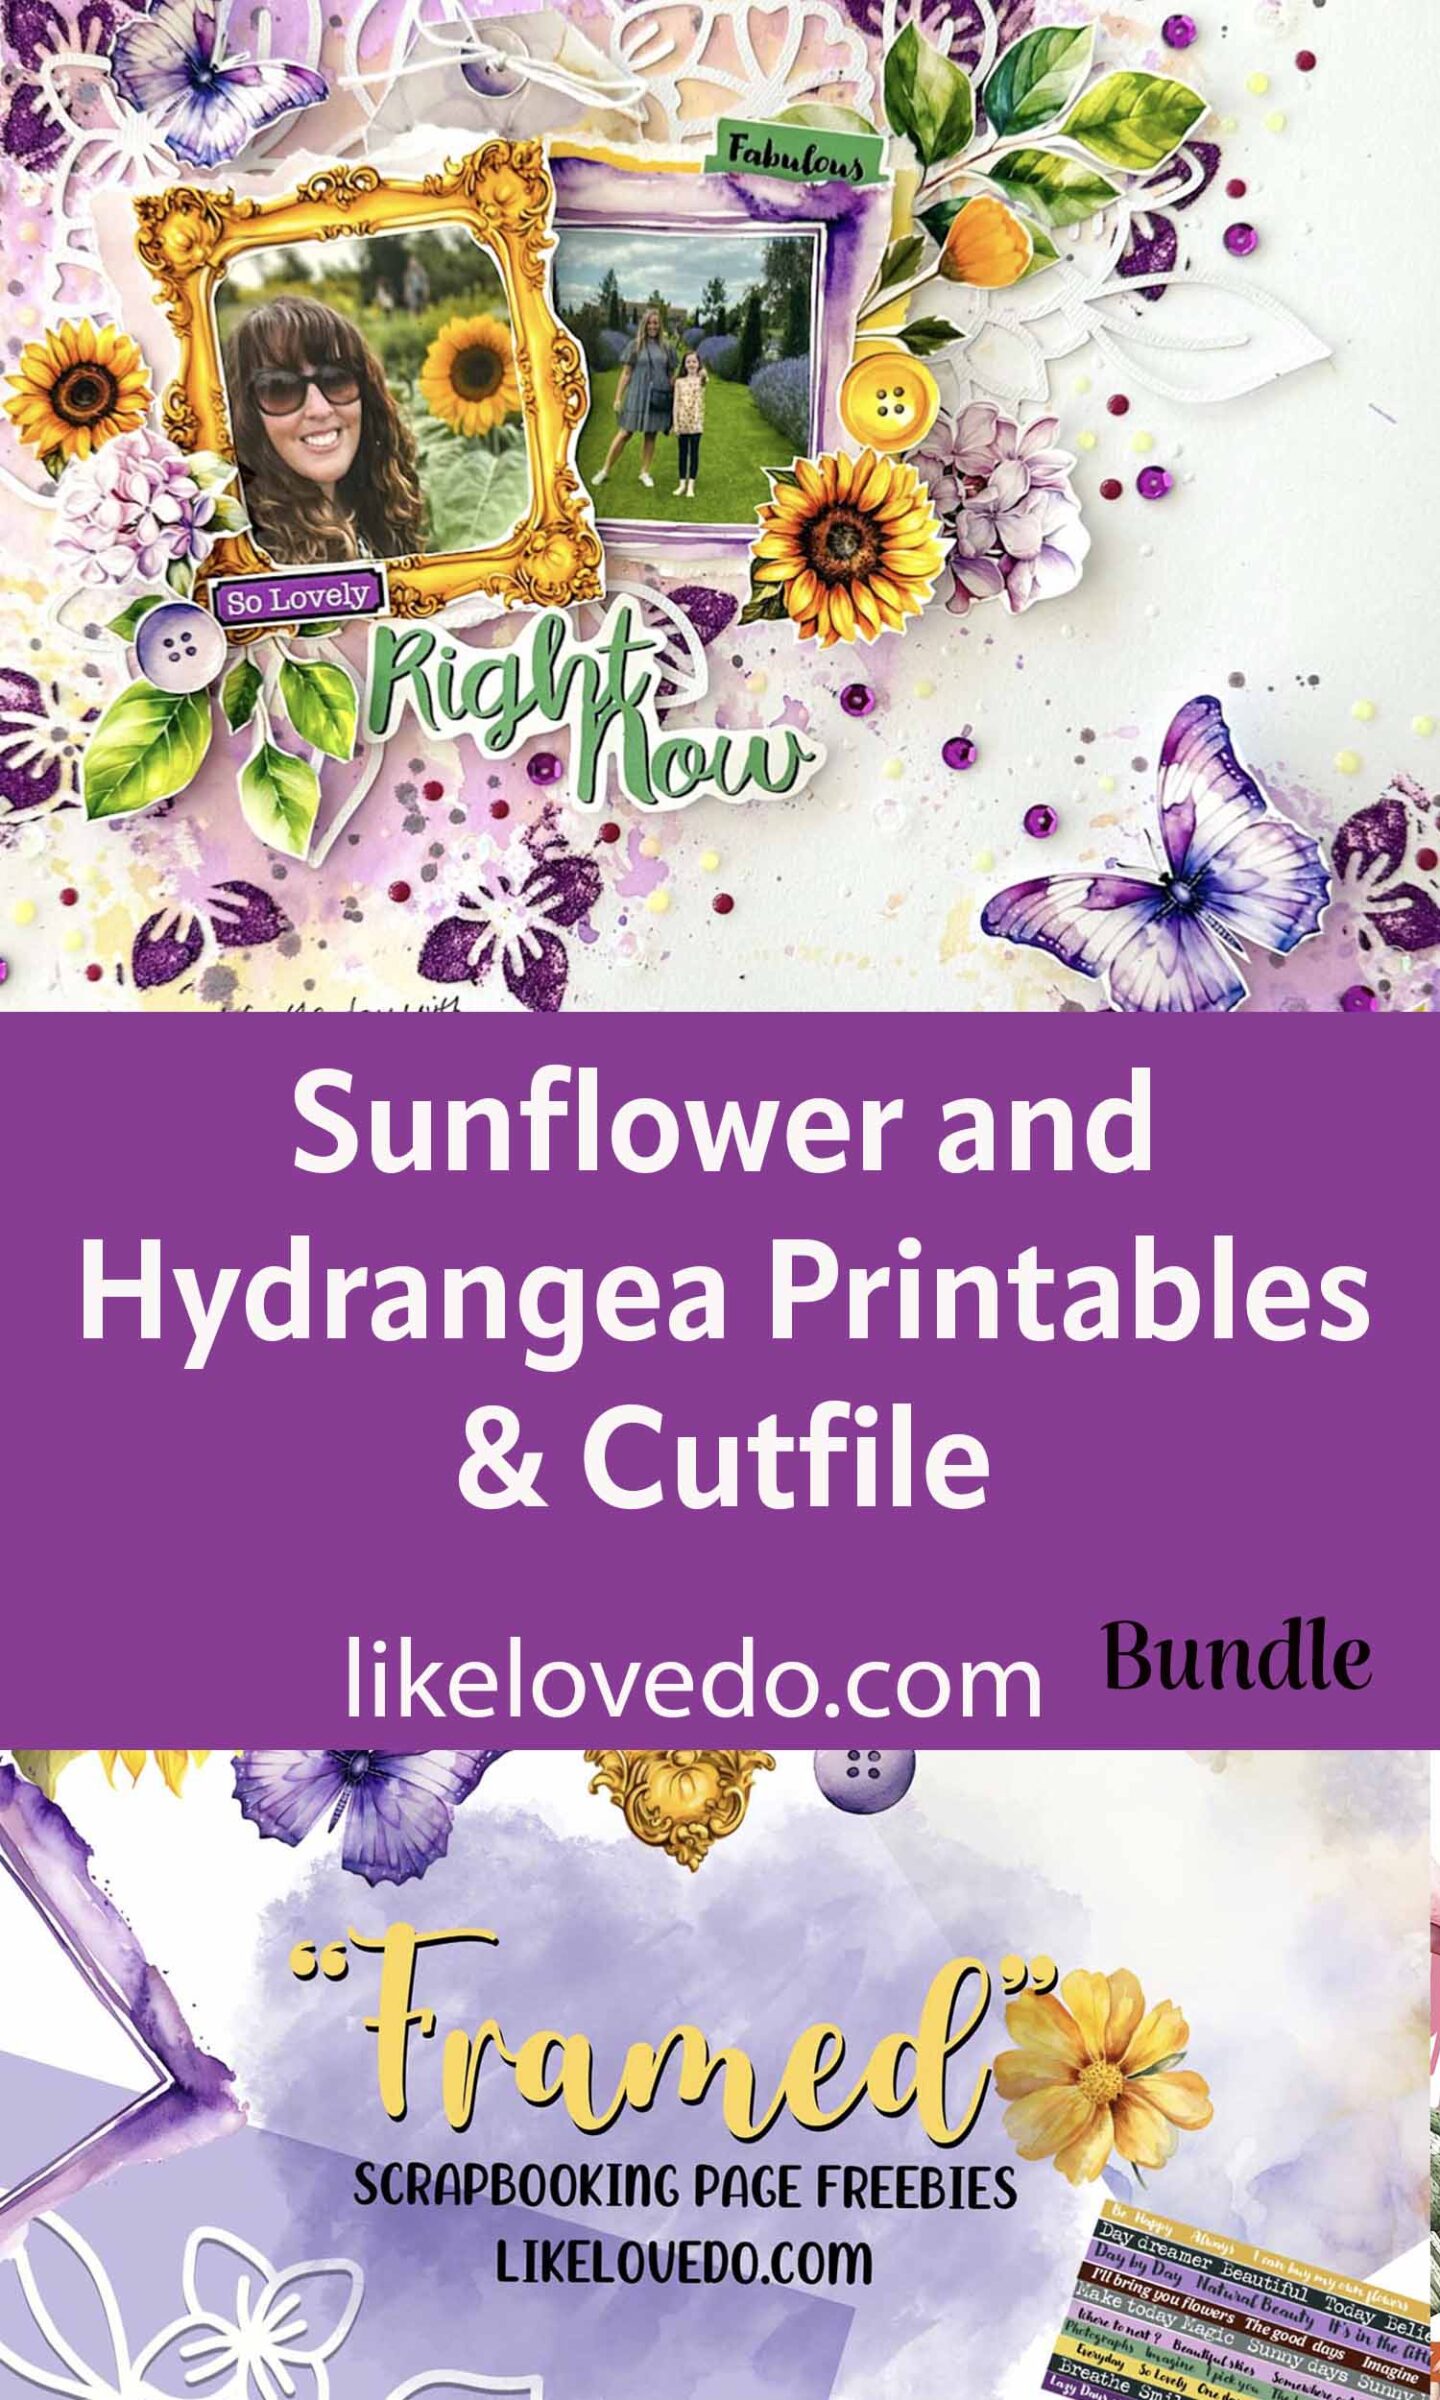
Collection of Sunflower and Hydrangea Scrapbooking Printables, papers, words and floral cut file
What is included in the Sunflower and Hydrangea Scrapbooking Printables?
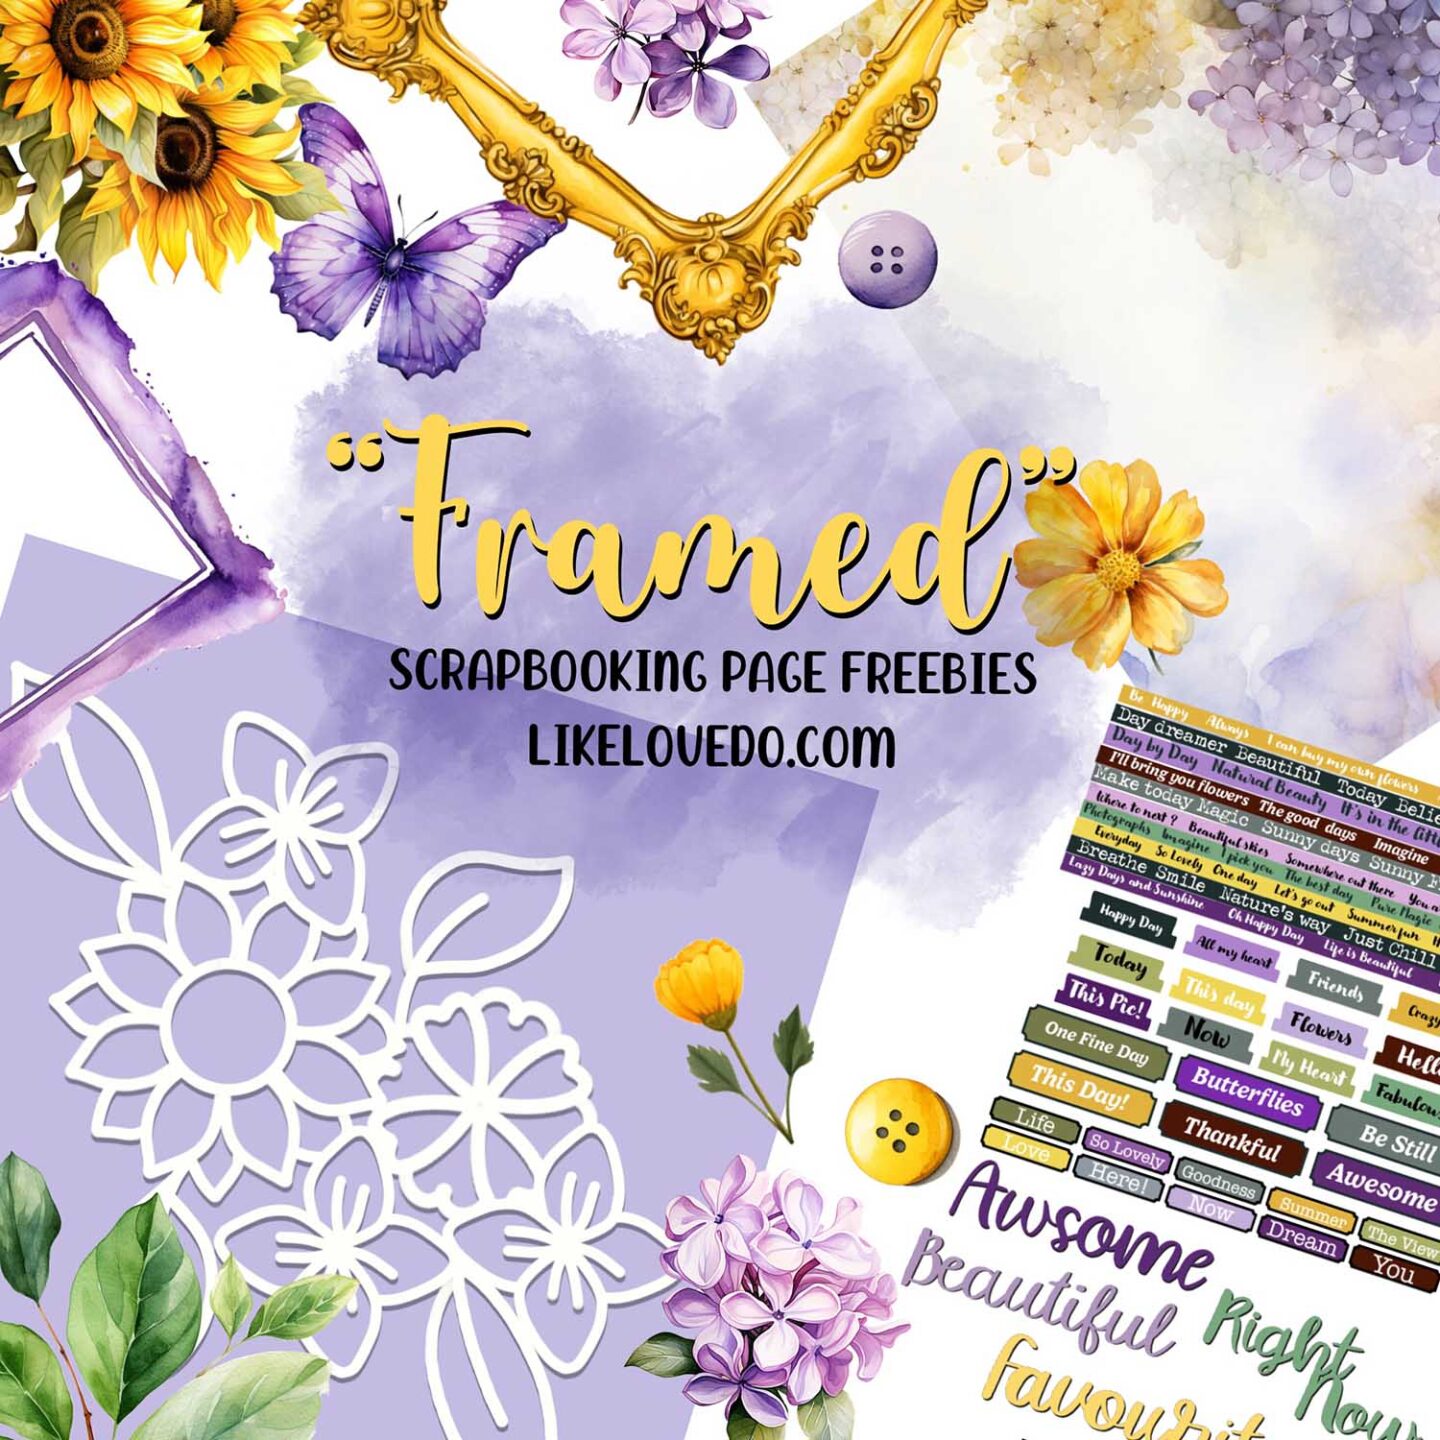
Included in the Sunflower and Hydrangea Scrapbooking Printables are:
- One sheet A4 PDF of Sunflower and Hydrangea Scrapbooking Printables to fussy cut.
- One sheet of words to fussy cut
- Three A4 patterned papers
- One floral Cut file.

About the Scrapbooking Summit
Ready to take your scrapbooking and cardmaking skills to new heights? Looking for fresh ideas and inspiration for your holiday gifts and cards? If so, you won’t want to miss the Scrapbooking Fun Summit – the ultimate event for all papercraft enthusiasts!
Whether you’re a seasoned or beginner scrapbooker or cardmaker, this event is for you and it’s completely free to attend. Here’s why:
- Discover New Ideas: Learn from world-class paper crafting experts, including holiday-inspired card and gift ideas.
- Ignite Your Creativity: Get inspired and motivated in your creativity.
- Connect and Have Fun: Enjoy four days of fun and the opportunity to meet new people.
You can sign up for the free summit here and purchase the VIP Bundle here. If you would like to take part in the VIP Bundle check out this cosy collection too for and idea on whats on offer!

Instructions to make the Sunflower and Hydrangea Scrapbooking Printables
If you would like to make this sunflower and hydrangea floral page you can use these instructions below.
Materials
- Free Framed scrapbooking printable kit containing, patterned paper, words, embellishments and a cut file. Or use your own papers, if so you will need two different patterned papers (6×6 or larger), some matching flower embellishments, word stickers or alphas.
- One 12×12 sheet of white cardstock to cut your cut file or letter size card stock.
- One sheet of 12 x12 smooth cardstock for your background
- Printable card if you are printing the printable’s
- Two photos approximately 2.5 x 2.5 inches.
- Watercolour paints or Distress Oxide to match either your papers or the printables. I used yellow ( scattered Straw ) and purple ( wilted Violet )
- Nuvo drops and/or sequins in matching colours. I used Jewel Drops ( yellow iris) purple Crystal Drops (Windsor wine) and simply white. The sequins I used were purple and clear.
- Not essential but if you have a matching texture paste, I used Nuvo glimmer paste in purple (astral aubergine) plus a spreader.
- Your choice of glue With fine tip
- Foam dots or pads
- Journal pen in black
- Paint brush
- Scissors
- water
- Matching embroidery thread
- A piece of plastic packaging
- A printer to print printables
- A cutting machine for the cut file. If you do not have a cutting machine do not you can still do the page. I would use more patterned papers and sequins instead or die cut some flowers if you have a die cut machine.
Instructions
- Cut out your cut file x 2 at 6 inches wide. If you would like to do the extra inspiration layout shown at the end cut out another one at 10 inches wide. All 3 cut files will fit on one 12×12 sheet or 2 letter size.
- Print: Fussy cut embellishments, words, print patterned paper. Note; if you do not want to print all of the patterned papers one or two would work. I did use all three but more in the extra inspiration layout.
- Arrange your cut files on the paper and remove two small leaves and one flower from under where the photos will be. Set these and the cut files aside for later.
- Using either water colour paint or oxide ink pad add a large amount of colour to the top left corner and and a small amount to the bottom left corner using the plastic packaging. Swipe ink on the plastic and add water. Lift the plastic and add directly to the page lifting up and down as you go. Repeat with two different colours untill you are happy with how it looks.
- Splash drops of paint or watered down ink pad with a brush over these two areas.
- Using the flower you cut from the cut file apply textured paste through it around the areas you painted. Do not worry if it’s slightly messy. Leave to dry.
- While you wait for it to dry cut out all of the fussy cuts on the printable page. Cut a title and some words that fit your photo from the word sheet.
- Place one photo in the yellow frame and one photo in a purple frame ( I used the slightly smaller purple frame)
- Back these frames onto two torn pieces of patterned paper. Tear a piece of yellow water colour paper to 3×3 inches and one piece or purple by 3×3 inches. Stick opposite colours to the back or the photo frames slightly offsetting them and by using some foam pads for depth.
- Cut a tag shape from patterned paper at about 2 inches wide. You do not need it to be too long as it will only show the top. Add a paper button and some thread if you wish.
- Top left corner; Stick down your cut files as arranged. Arrange two photos and stick down with foam dots to raise. Tuck top of tags behind. Add flowers to the left a right putting the opposite colours on the frame. I used foam pads for height, add small words to frames and title underneath using foam dots. Tuck two green leaves under the frames either side using glue. Add the two white cut off leaves into spaces under and above photo. Add buttons and butterfly.
- Bottom right corner; tear a strip of patterned paper ( I used yellow ) Strickland to corner. Add bunch of sunflowers and lilacs using foam dots. Add words and button with foam pads. Add large butterfly.
- Using a range of Nuvo dot and sequins decorate around these two areas using dots and glue for the sequins.
- Hand draw a stitched sequin border and write some journalling.
Download your Sunflower and Hydrangea Scrapbooking Printables here!
Sign up to the Scrapbooking summit for a free code to download the freebie below. Check it out with the code in my shop.

See another take on using this kit below with a larger cut file in my extra inspiration layout.